envd on Kubernetes (Experimental)
WARNING
This feature is in the experimental stage, which means it may be subject to change.
envd allows you to manage your development environments on Kubernetes. You can use envd command to create, delete, and update development environments.
Run envd-server on Kubernetes
This feature requires a envd-server running on the Kubernetes. The envd-server is a piece of software that can help you manage your AI/ML environments more effectively. It is easy to use and has a wide range of features.
You need to deploy it with the helm chart provided in the envd-server repository:
$ git clone https://github.com/tensorchord/envd-server
$ cd ./envd-server
$ helm install envd-server ./manifests
You can customize the envd-server by modifying the values.yaml file. For example, you can change the server.debug value to true to enable the debug mode.
# envd server debug mode
server:
  debug: false
  noauth: true
  imagePullSecret: ""
  # Whether to run the database migration process
  migration: true
  # Leave blank will use ${image.Repository}-migration:${image.tag} as the migration image
  migrationImage: ""
Configure image pull secret (Optional)
This page shows how to create a envd server instance that uses a Secret to pull an image from a private container image registry or repository.
If you already ran docker login, you can copy that credential into Kubernetes:
kubectl create secret generic regcred \
    --from-file=.dockerconfigjson=<path/to/.docker/config.json> \
    --type=kubernetes.io/dockerconfigjson
Then you can check the secret:
kubectl get secret regcred --output=yamlThe output should be similar to this:
apiVersion: v1
kind: Secret
metadata:
  ...
  name: regcred
  ...
data:
  .dockerconfigjson: eyJodHRwczovL2luZGV4L ... J0QUl6RTIifX0=
type: kubernetes.io/dockerconfigjson
You can use the secret to pull the image:
$ helm install --set server.imagePullSecret=regcred envd-server ./manifestsThe server will use the secret to pull the image. If you have any problem, please take a look at the guide in Kubernetes documentation.
Port forward
After that, you need to forward two TCP ports to localhost.
$ export POD_NAME=$(kubectl get pods --namespace default -l "app.kubernetes.io/name=envd-server,app.kubernetes.io/instance=envd-server" -o jsonpath="{.items[0].metadata.name}")
$ kubectl --namespace default port-forward $POD_NAME 8080:8080 2222:2222
Create the envd context
To create a development environment, you could create a new envd context, to tell envd that we are going to use the envd-server to manage environments on Kubernetes.
$ envd context create --name envd-server --use --builder docker-container --runner envd-server --runner-address http://localhost:8080Create the environment on Kubernetes
After that, you can create environments by running the envd run command (which is a hidden command for now).
$ envd login
$ envd run --image tensorchord/python-basic
Or you could build the image by yourself and push it to the registry, and then create the environment by running the envd run command.
$ envd run --image <your-image>You could build and push the image to a public registry.
$ envd build --output type=image,name=docker.io/<loginname in docker hub>/<image>,push=true
$ envd login --username <username>
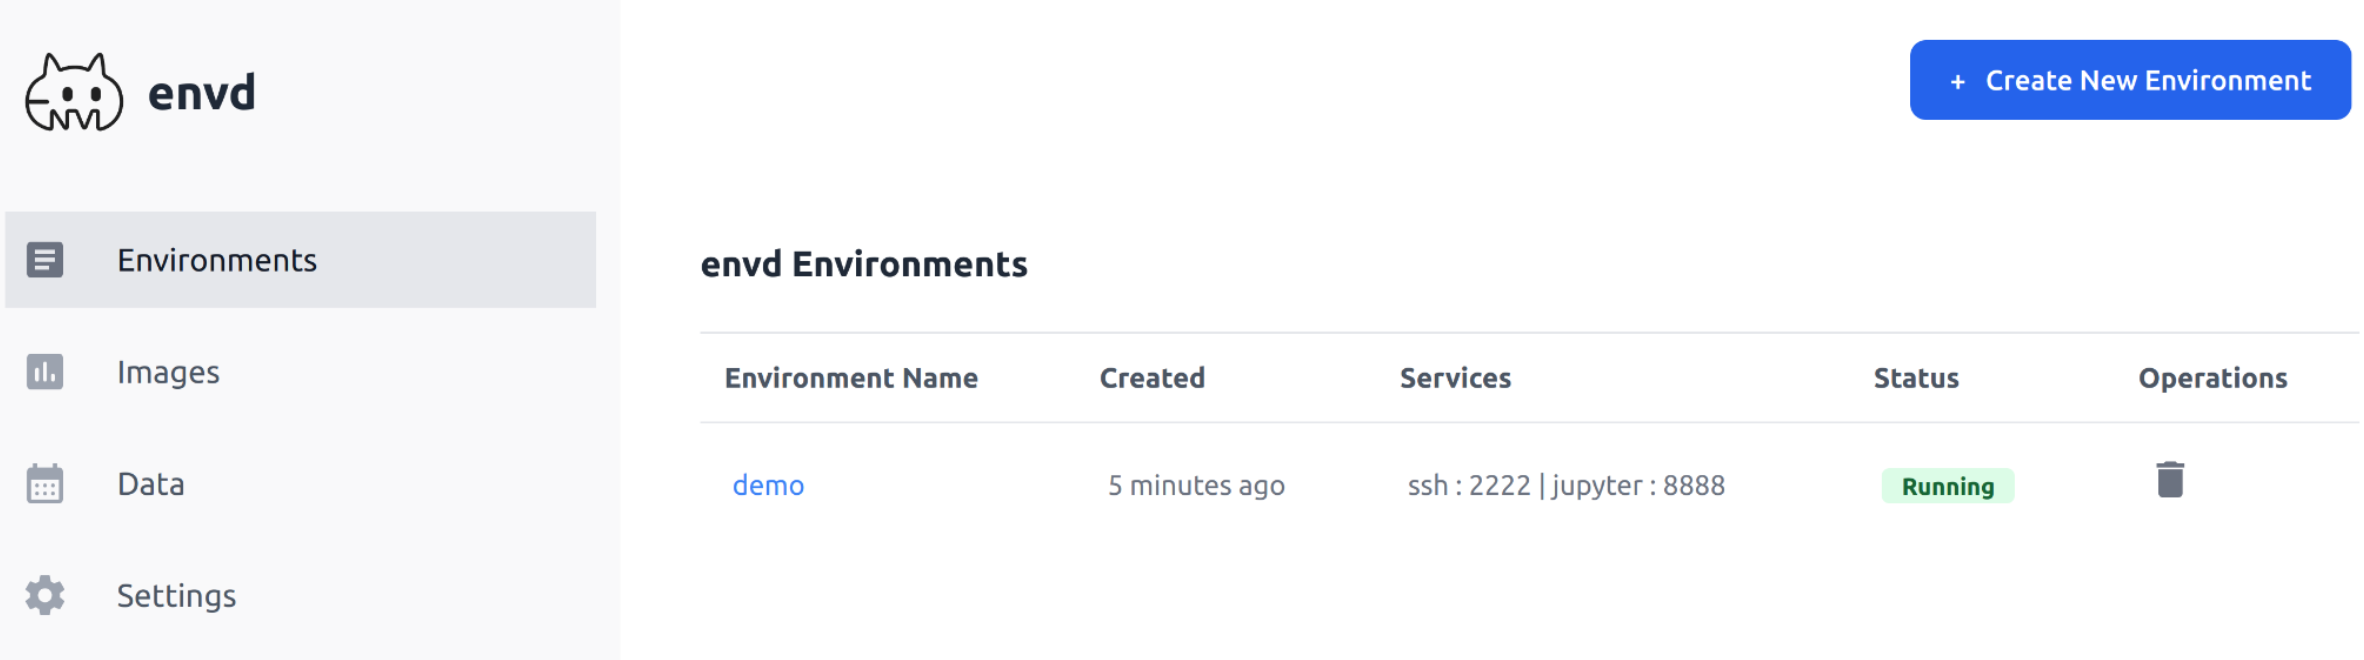
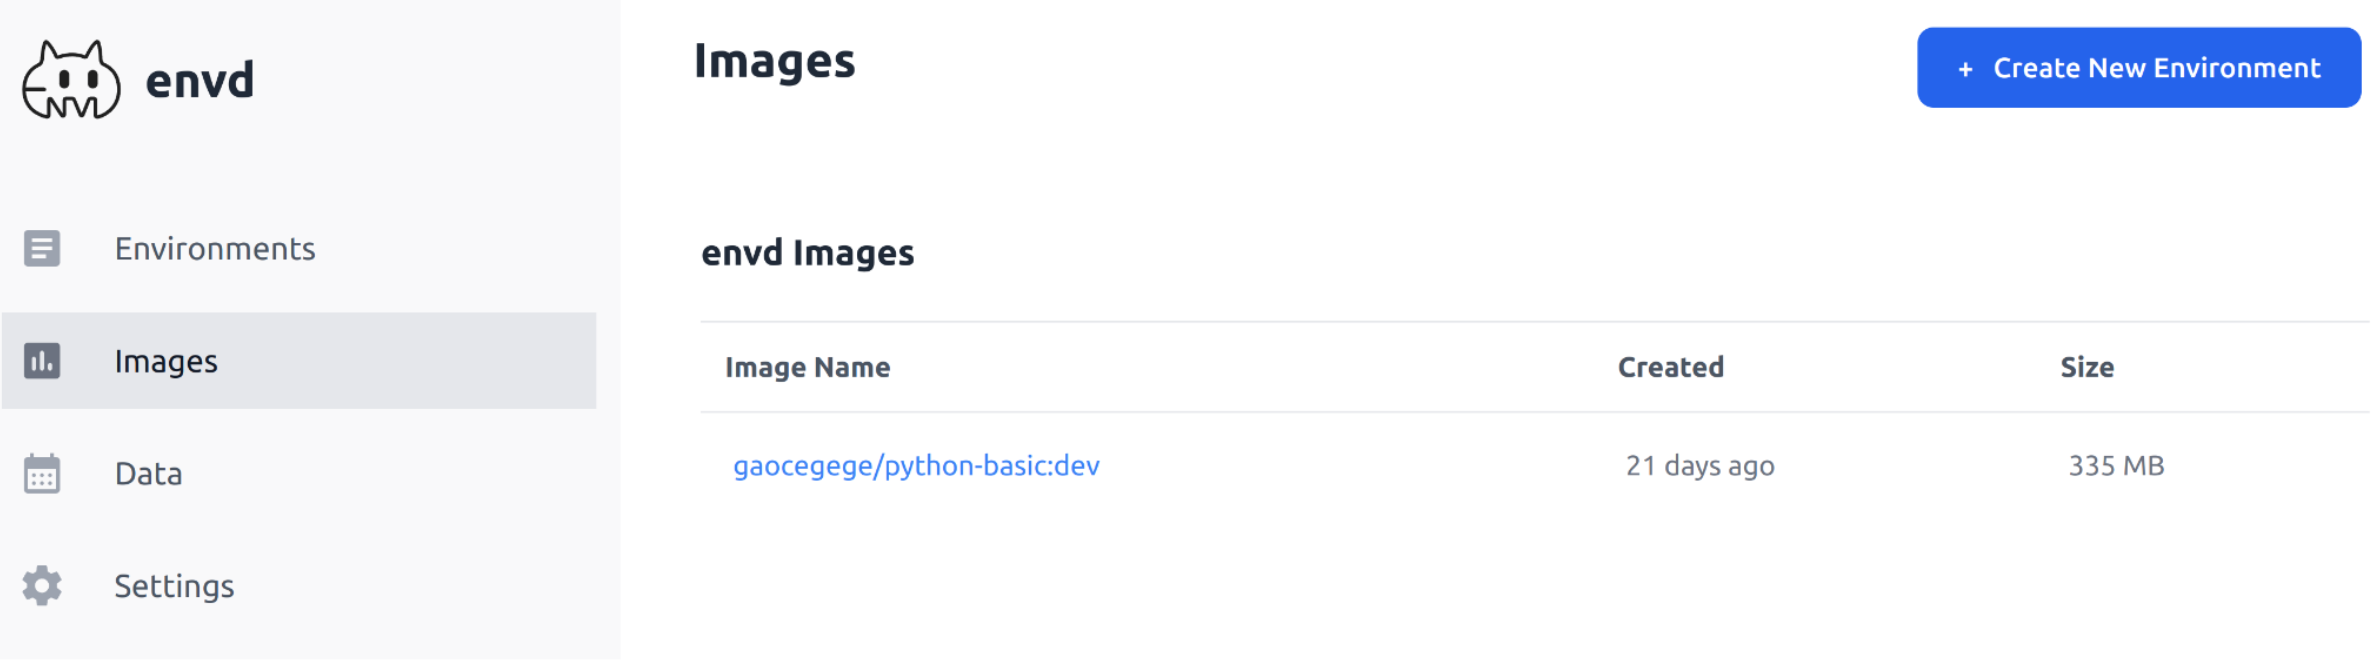
$ envd run --image <your-image>Dashboard
You can access the dashboard by visiting http://localhost:8080/dashboard/ in your browser.
Customization
You could customize the environment by adding a pod defaulting webhook to the Kubernetes cluster. Here is an example envd-server-pod-webhook.
The webhook will add an environment variable KUBE=true to the pod:
// Mutate returns a new mutated pod according to set env rules
func (se injectEnv) Mutate(pod *corev1.Pod) (*corev1.Pod, error) {
	se.Logger = se.Logger.WithField("mutation", se.Name())
	mpod := pod.DeepCopy()

	// build out env var slice
	envVars := []corev1.EnvVar{{
		Name:  "KUBE",
		Value: "true",
	}}

	// inject env vars into pod
	for _, envVar := range envVars {
		se.Logger.Debugf("pod env injected %s", envVar)
		injectEnvVar(mpod, envVar)
	}

	return mpod, nil
}
To deploy the webhook, you could run the following commands:
$ git clone https://github.com/tensorchord/envd-server-pod-webhook
$ cd ./envd-server-pod-webhook
$ make deploy